Anatomy of a GitHub Actions YAML
1 Getting started
All of the instructions that dictate the configuration of GitHub Actions are stored within YAML files, where YAML files and syntax are used in a wide variety of applications (such as for configuring this Quarto website). These files contain the different elements that were covered on the Basics page, such as jobs, steps, actions, and events.
Below is a simple YAML that lists all files stored in the GitHub Repository (repo) after pushing a commit to this repo:
simple.yml
- 1
- (Optional) name provided to the workflow
- 2
-
Syntax used for defining which event(s) to use to trigger workflow. Here, we specify that the GitHub Action YAML will be run on
pushto this repo. - 3
-
Custom name given to
jobof workflow. I usedtest_jobas the name, but this can be anything (as long as spaces and special characters aren’t used). - 4
-
This is where you define the
runnerto use. Unless there’s a specific reason to use an earlier version, best practice is to stick with the-latestversion of the different operating systems. - 5
- (Optional) name of the first step
- 6
-
Example of
usessyntax for using a pre-made action. In this case, thecheckoutaction is selected since this is typically the first step of any workflow. You need to specify the version of the action you’ll be using (i.e.,@v5), of which version 5 is the latest available. - 7
-
Example of
runsyntax for running code directly in the YAML file. In this case, thelscommand is used to list all files in the root directory of the repo.
As also mentioned on the Basics page, these YAML files need to be stored within the .github/workflows directory of your repo. If you don’t currently have this directory, you’ll need to create this manually. And since file paths that begin with a period (.) at the beginning are considered hidden files, this may require adjusting settings for your file explorer/finder application, or through use of the terminal.
For example, if the above YAML code was stored in a file named simple.yml, then you would run the following command to move this file from your root directory to the correct .github/workflows directory:
mv simple.yml .github/workflows
In subsequent examples, we will build in increasing components and complexity that are more likely to reflect GitHub Actions workflows that are expected to be more useful in tasks for both software development and scientific research.
2 Viewing workflows in action
Once you’ve created your workflow YAML file for GitHub Actions, you’ll need to commit and push this file to your remote (i.e., the version of your repo that lives in the cloud via the GitHub website). This will then allow the action to be used whenever a triggering event occurs.
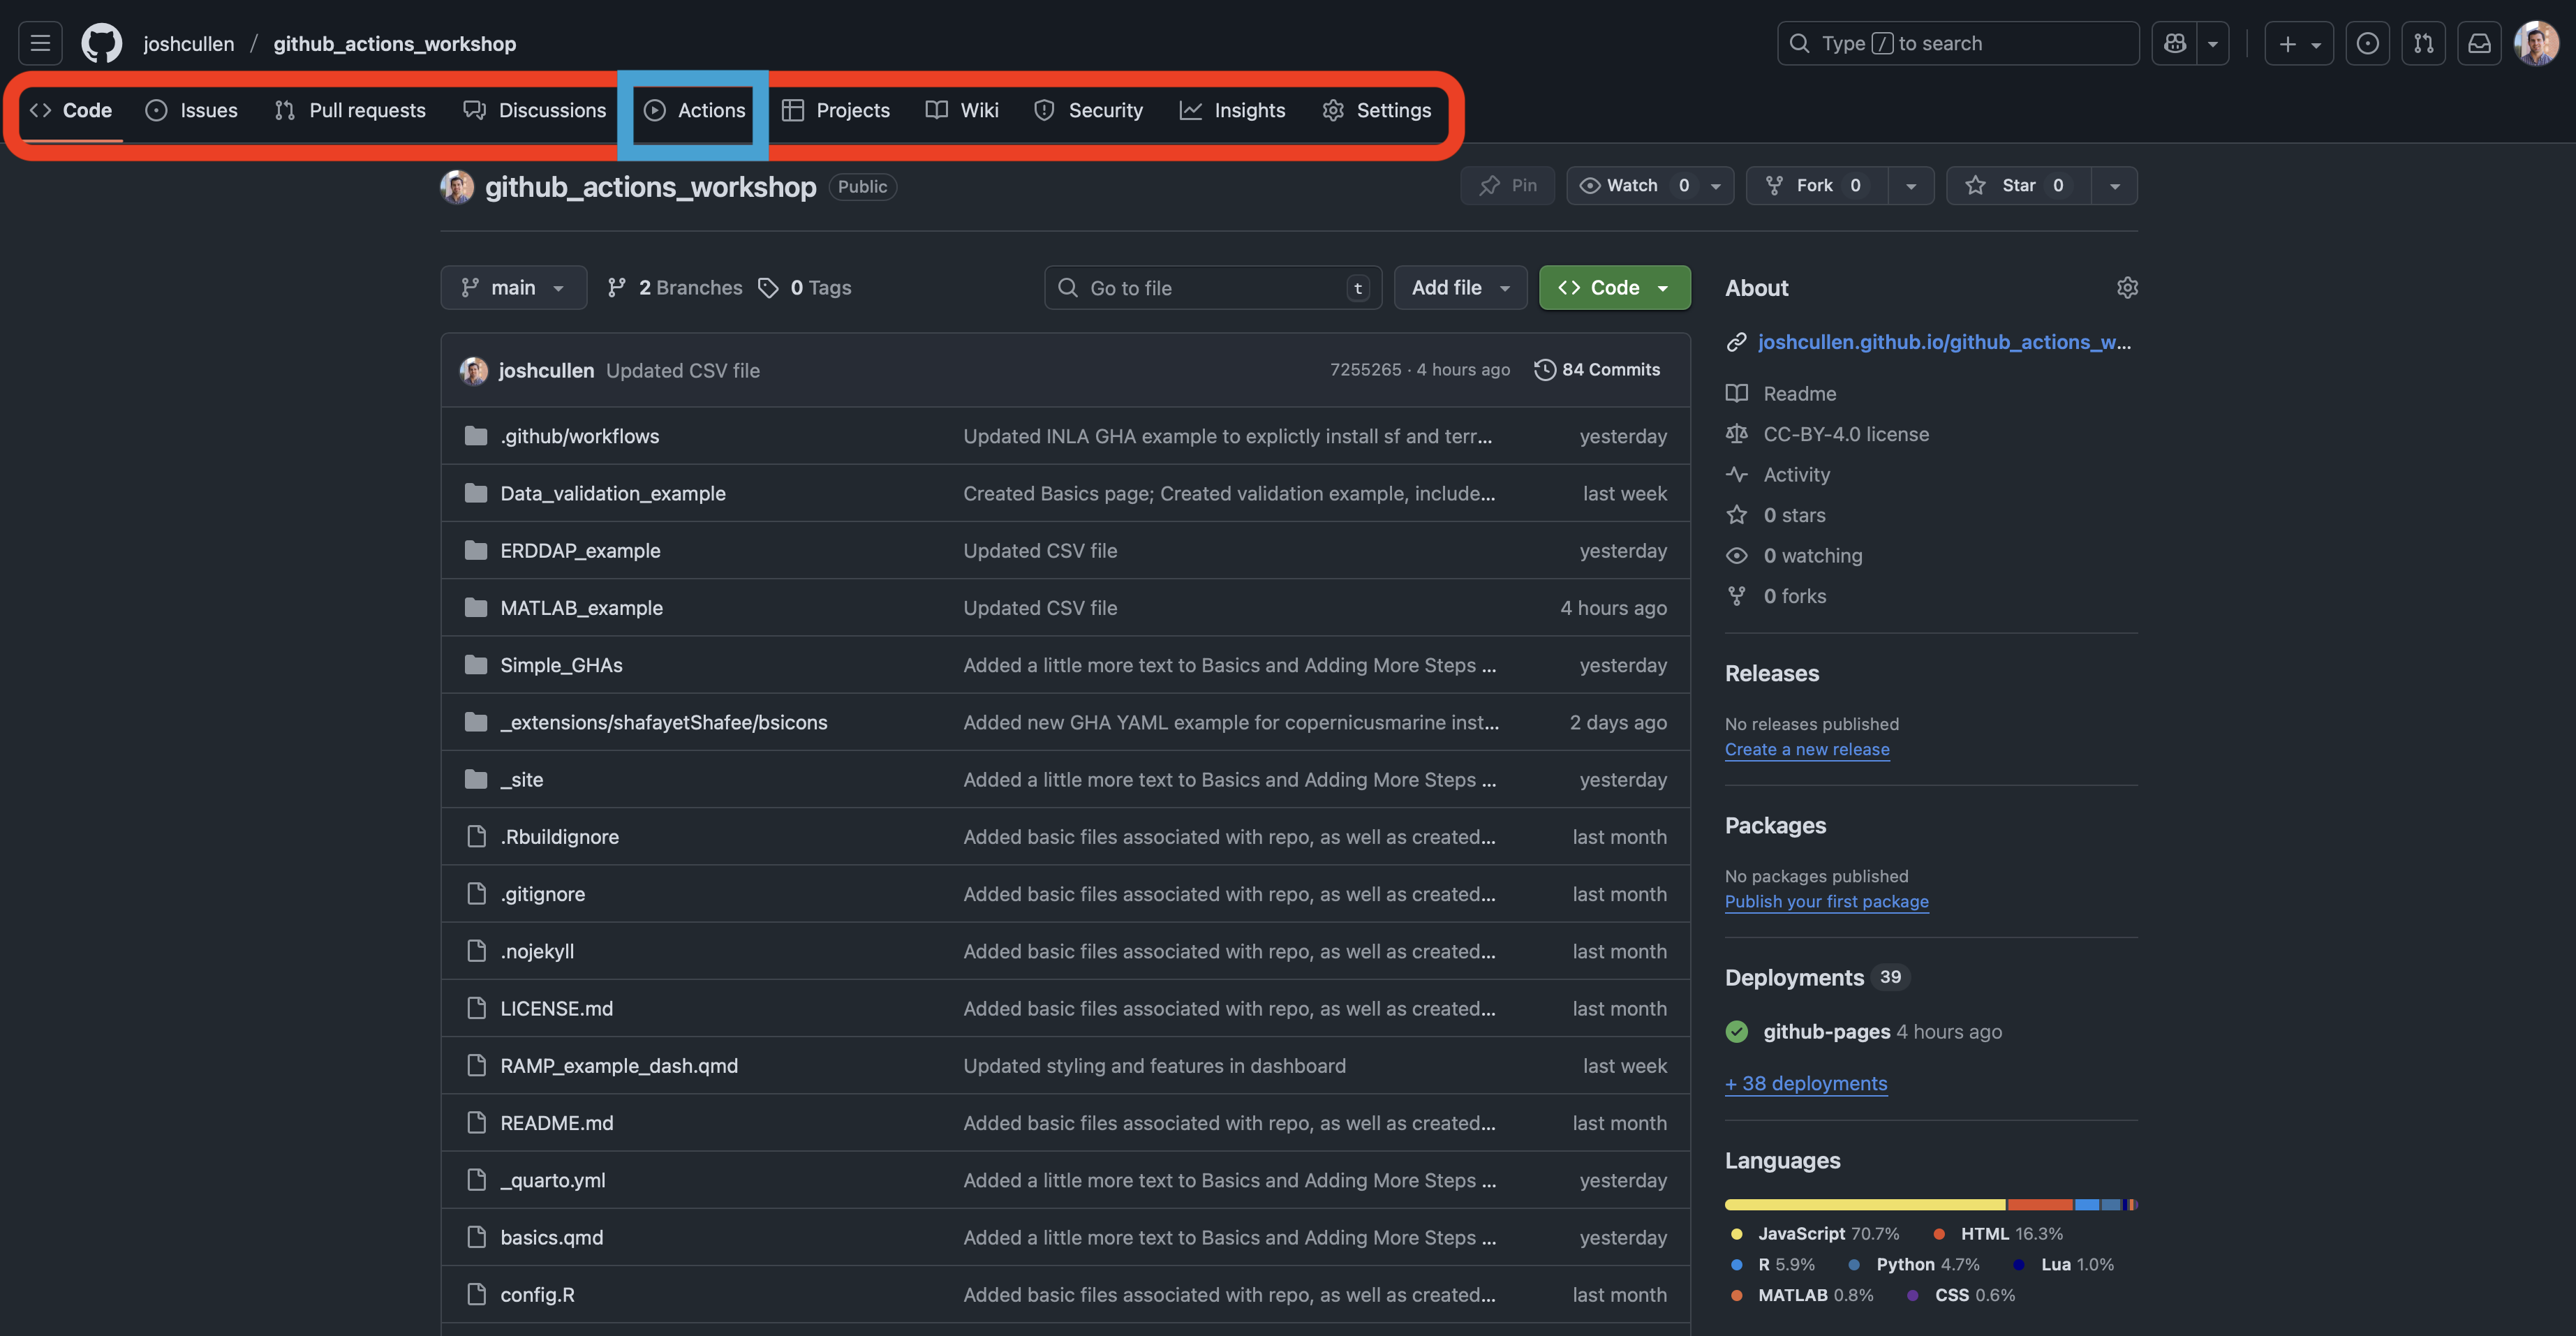
The repo should now resemble something like this, where you see the folders and files listed (including the new .github/workflows directory with the simple.yml file), as well as different tabs above the title of your repo (including the “ Actions” tab):
If we click on this “ Actions” tab, you’ll see a page that generally looks like this but will essentially be empty if you haven’t run any GitHub Actions for this repo:
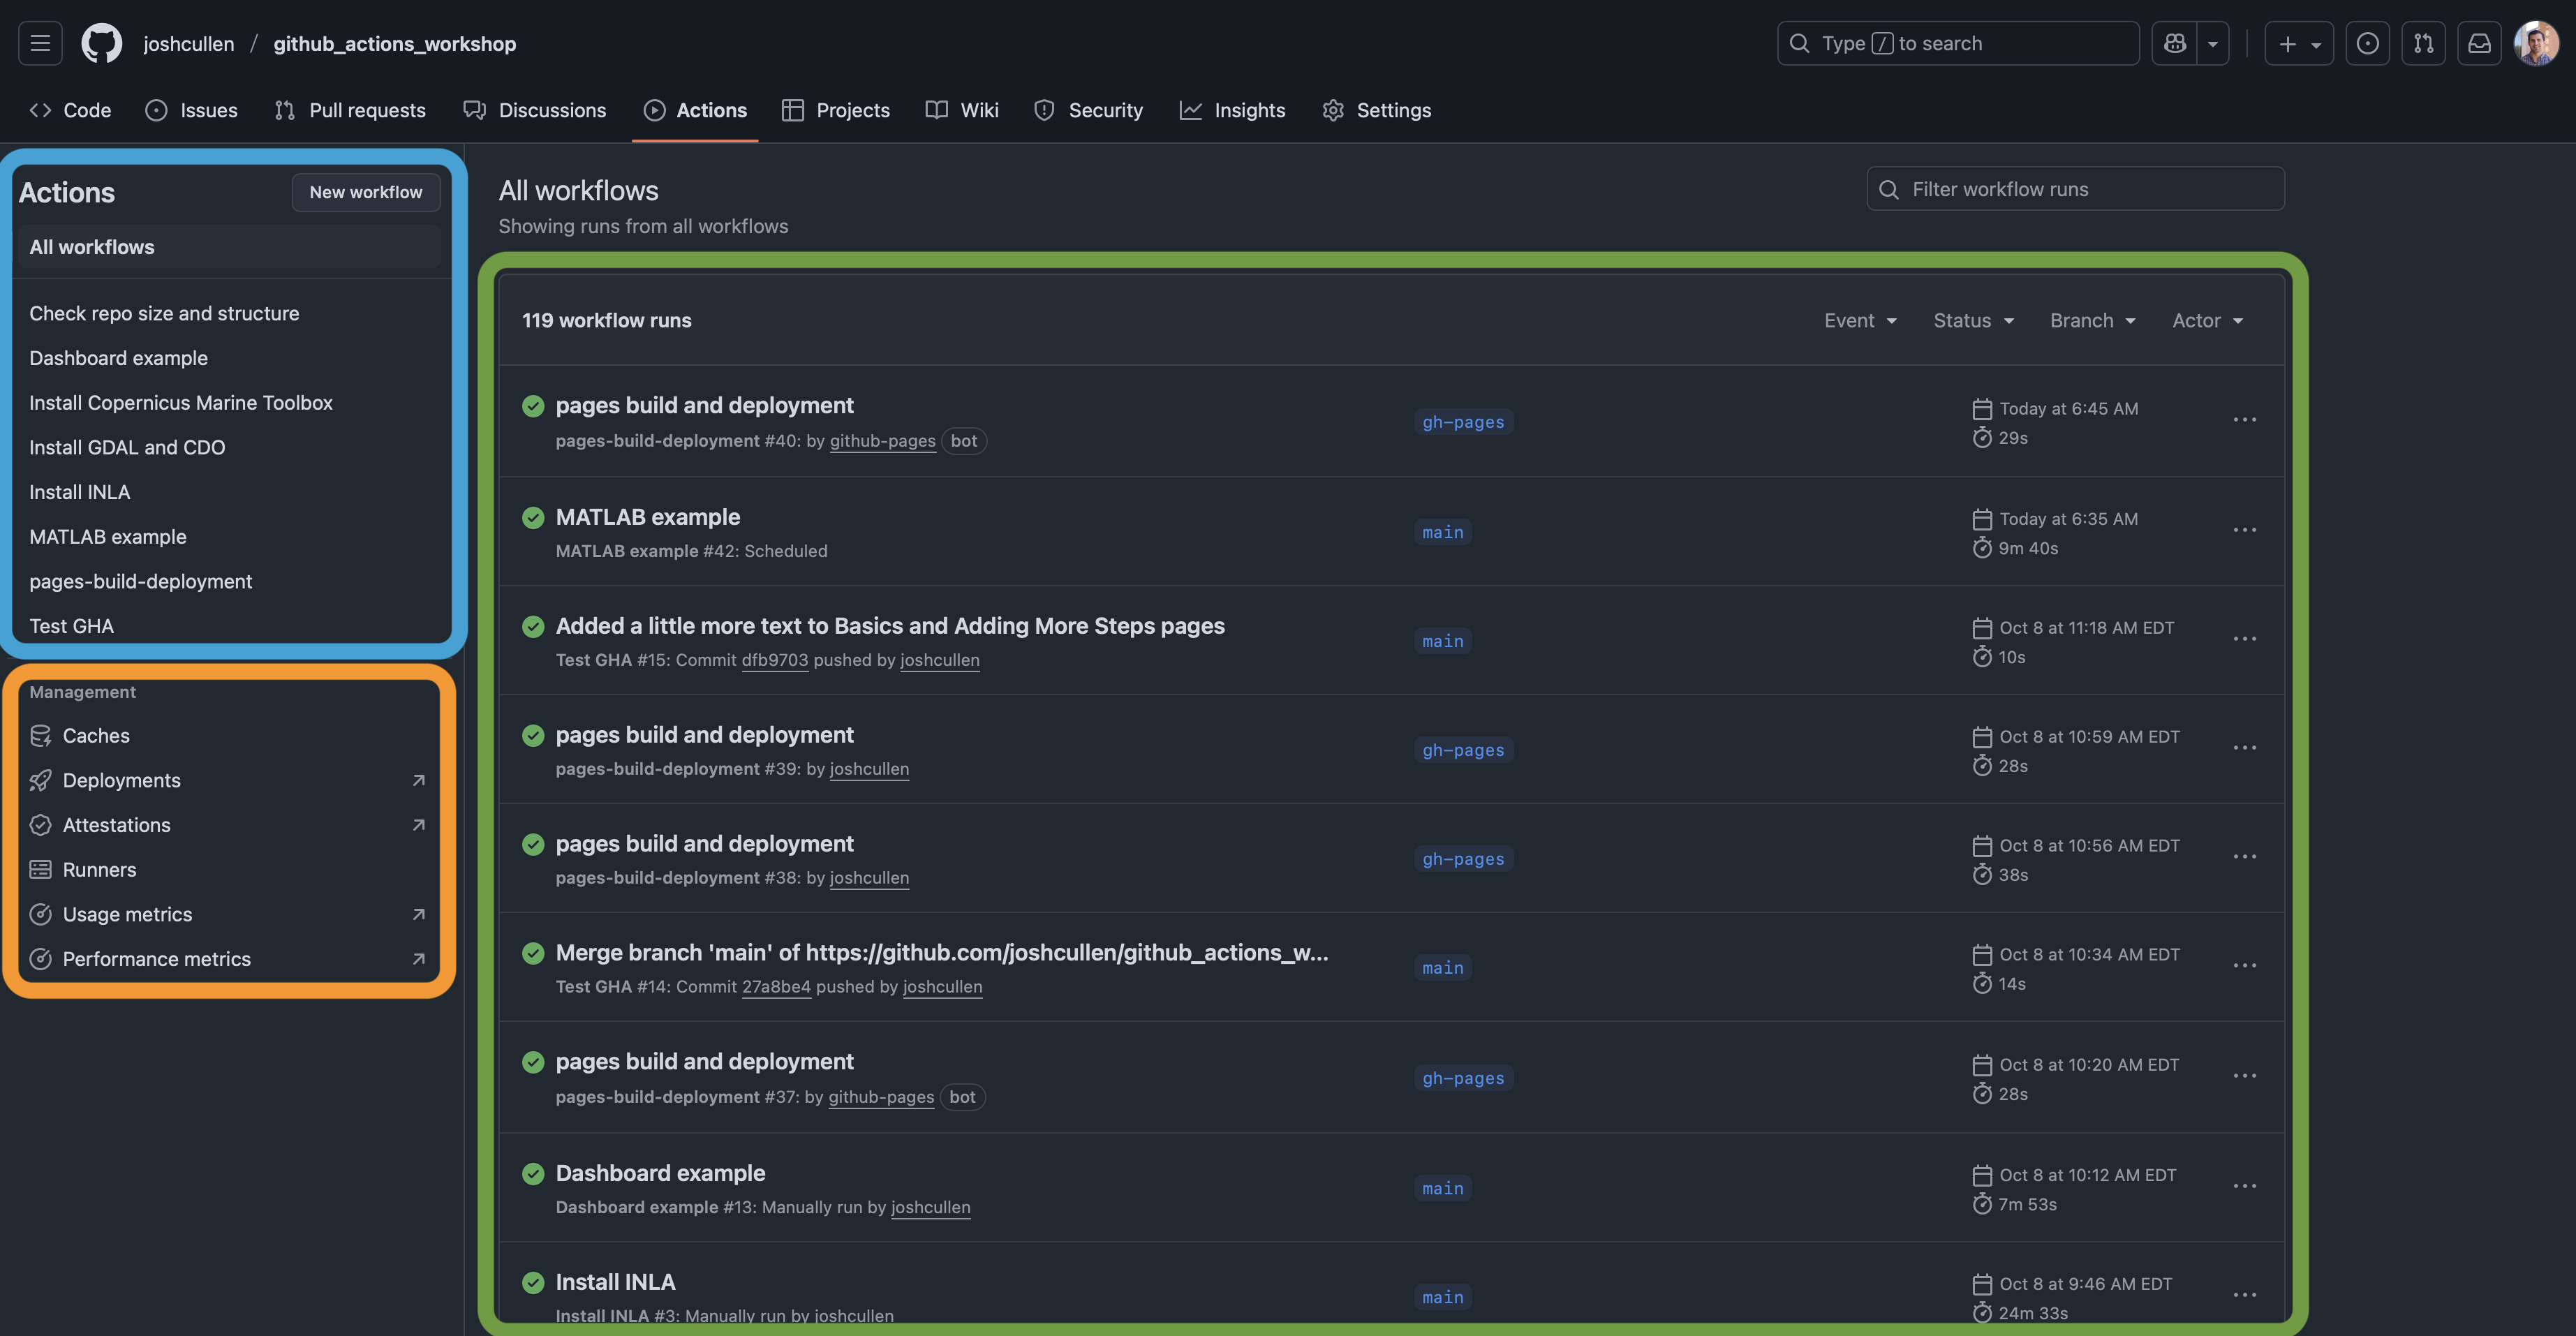
This page shows your full GitHub Actions history, which can be explored in more detail to examine what’s happening in each step and identify where problems may be occurring. On the left side of each workflow, there will be a symbol denoting its status, which can either be a successful completion (), failed run (), or in-progress ().
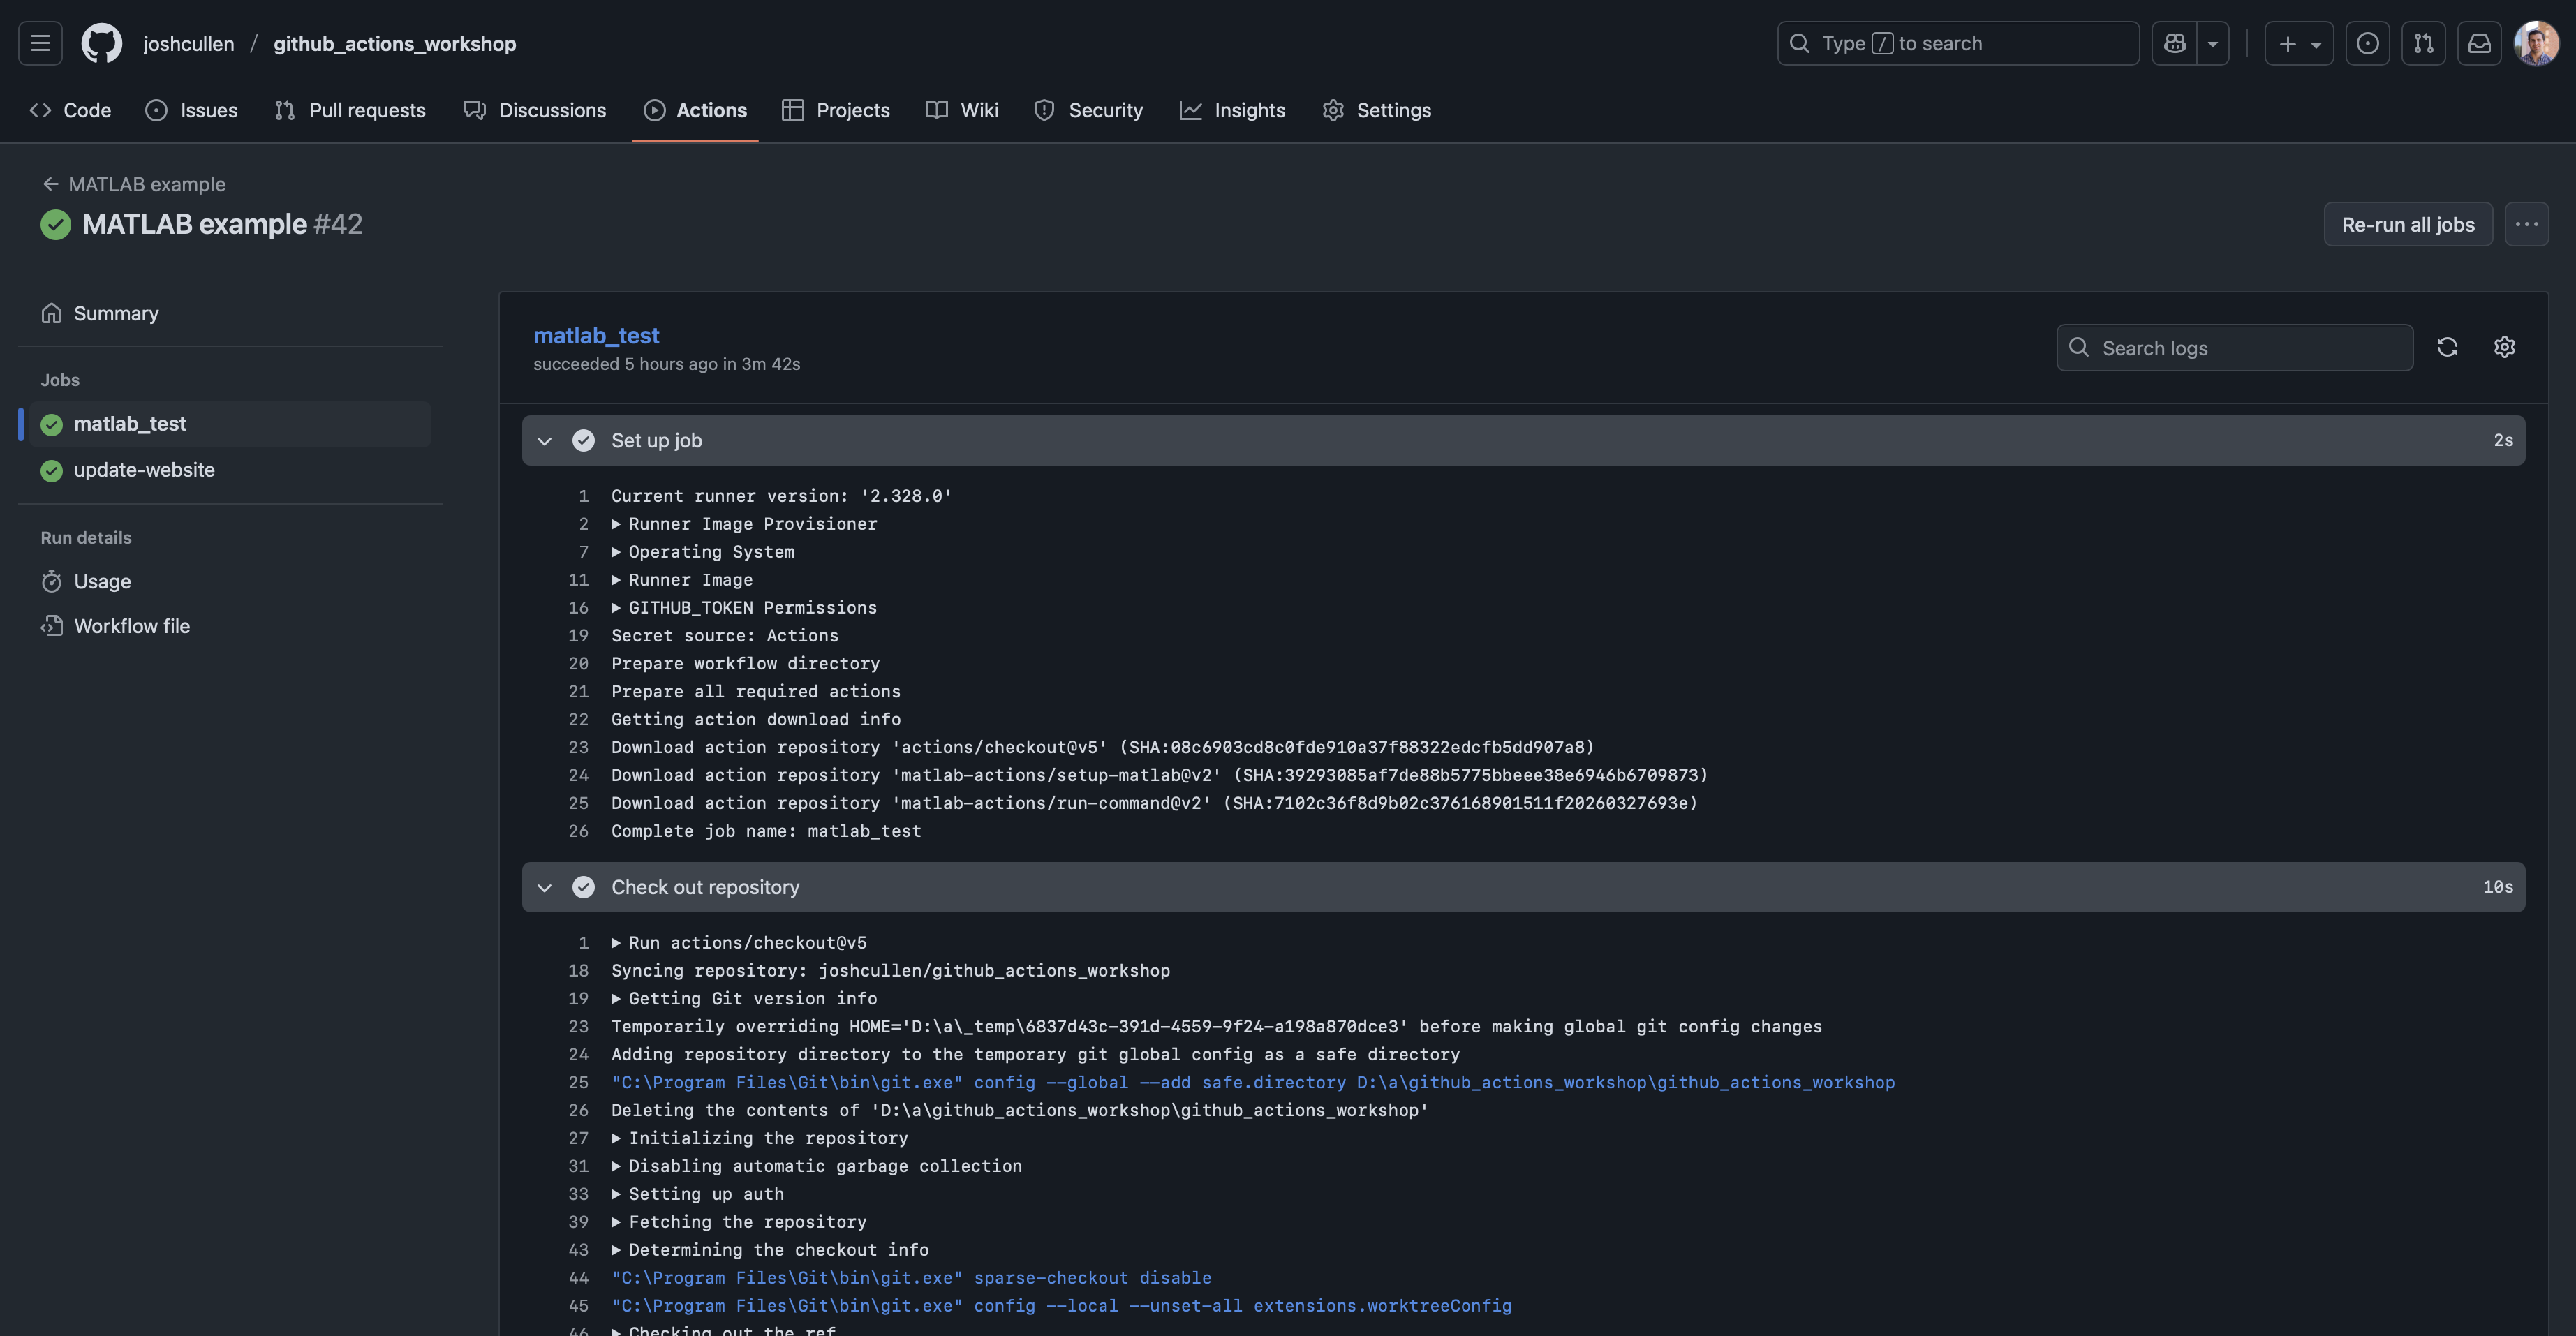
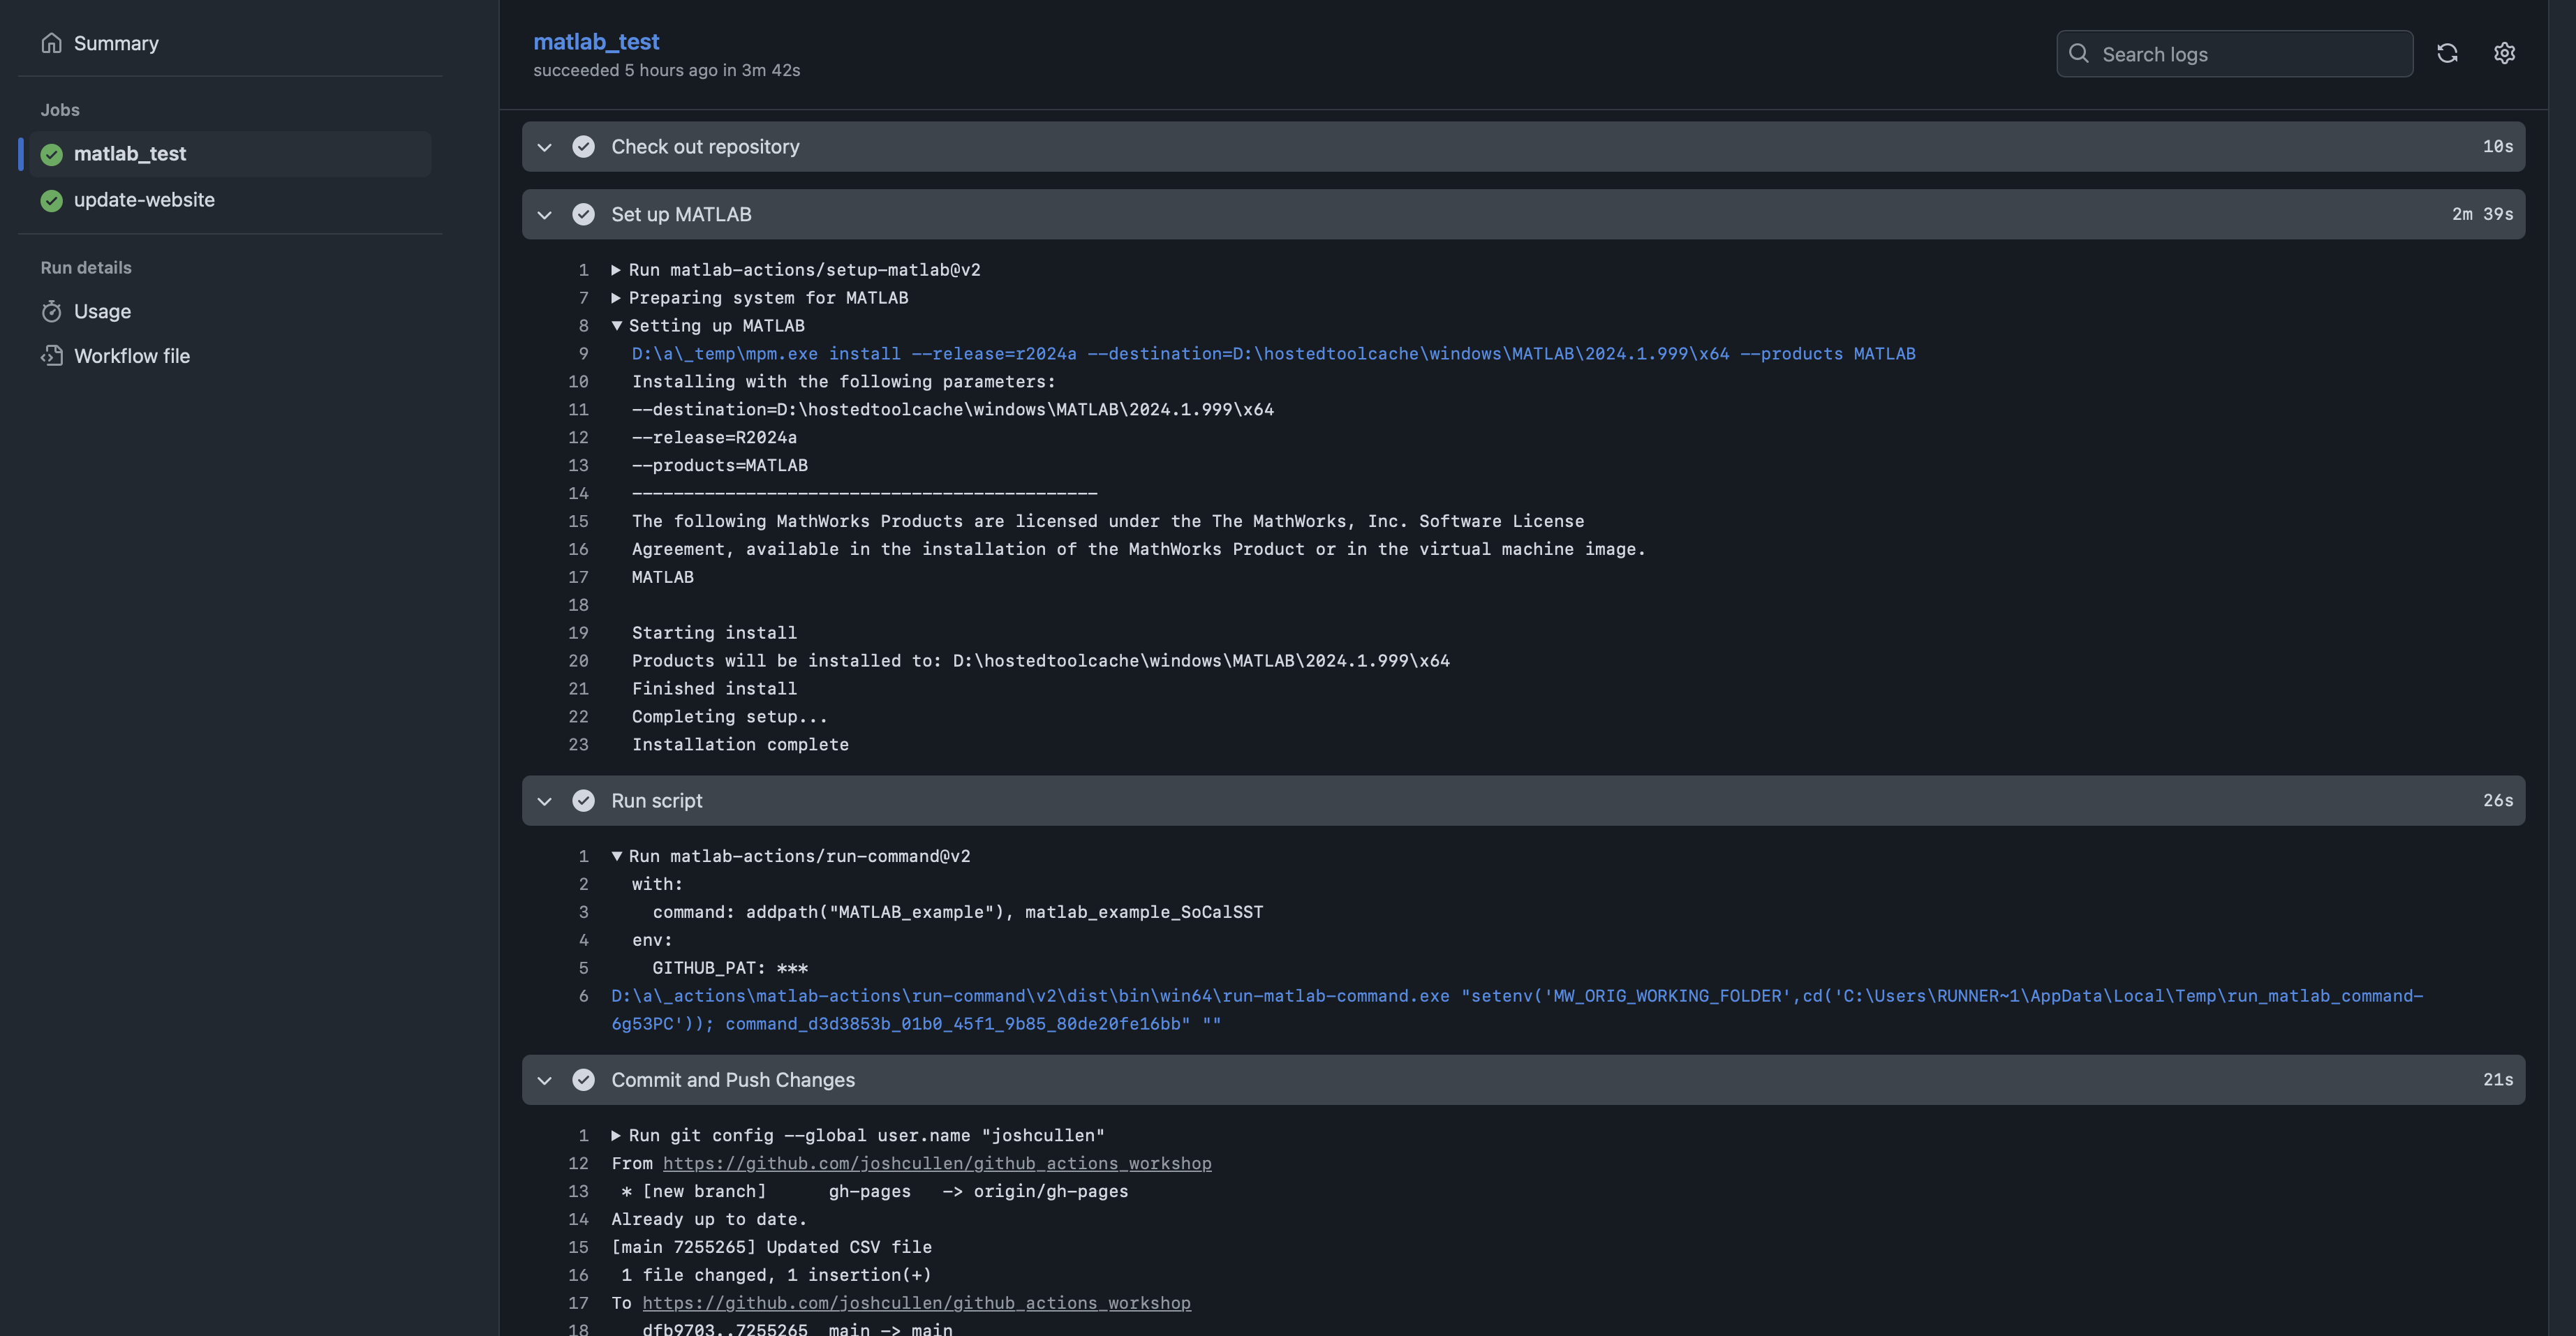
If we click on one of these recently run workflows, such as “MATLAB example”, we can dig in a bit more to see which jobs were run and the output of the different actions and commands we used:
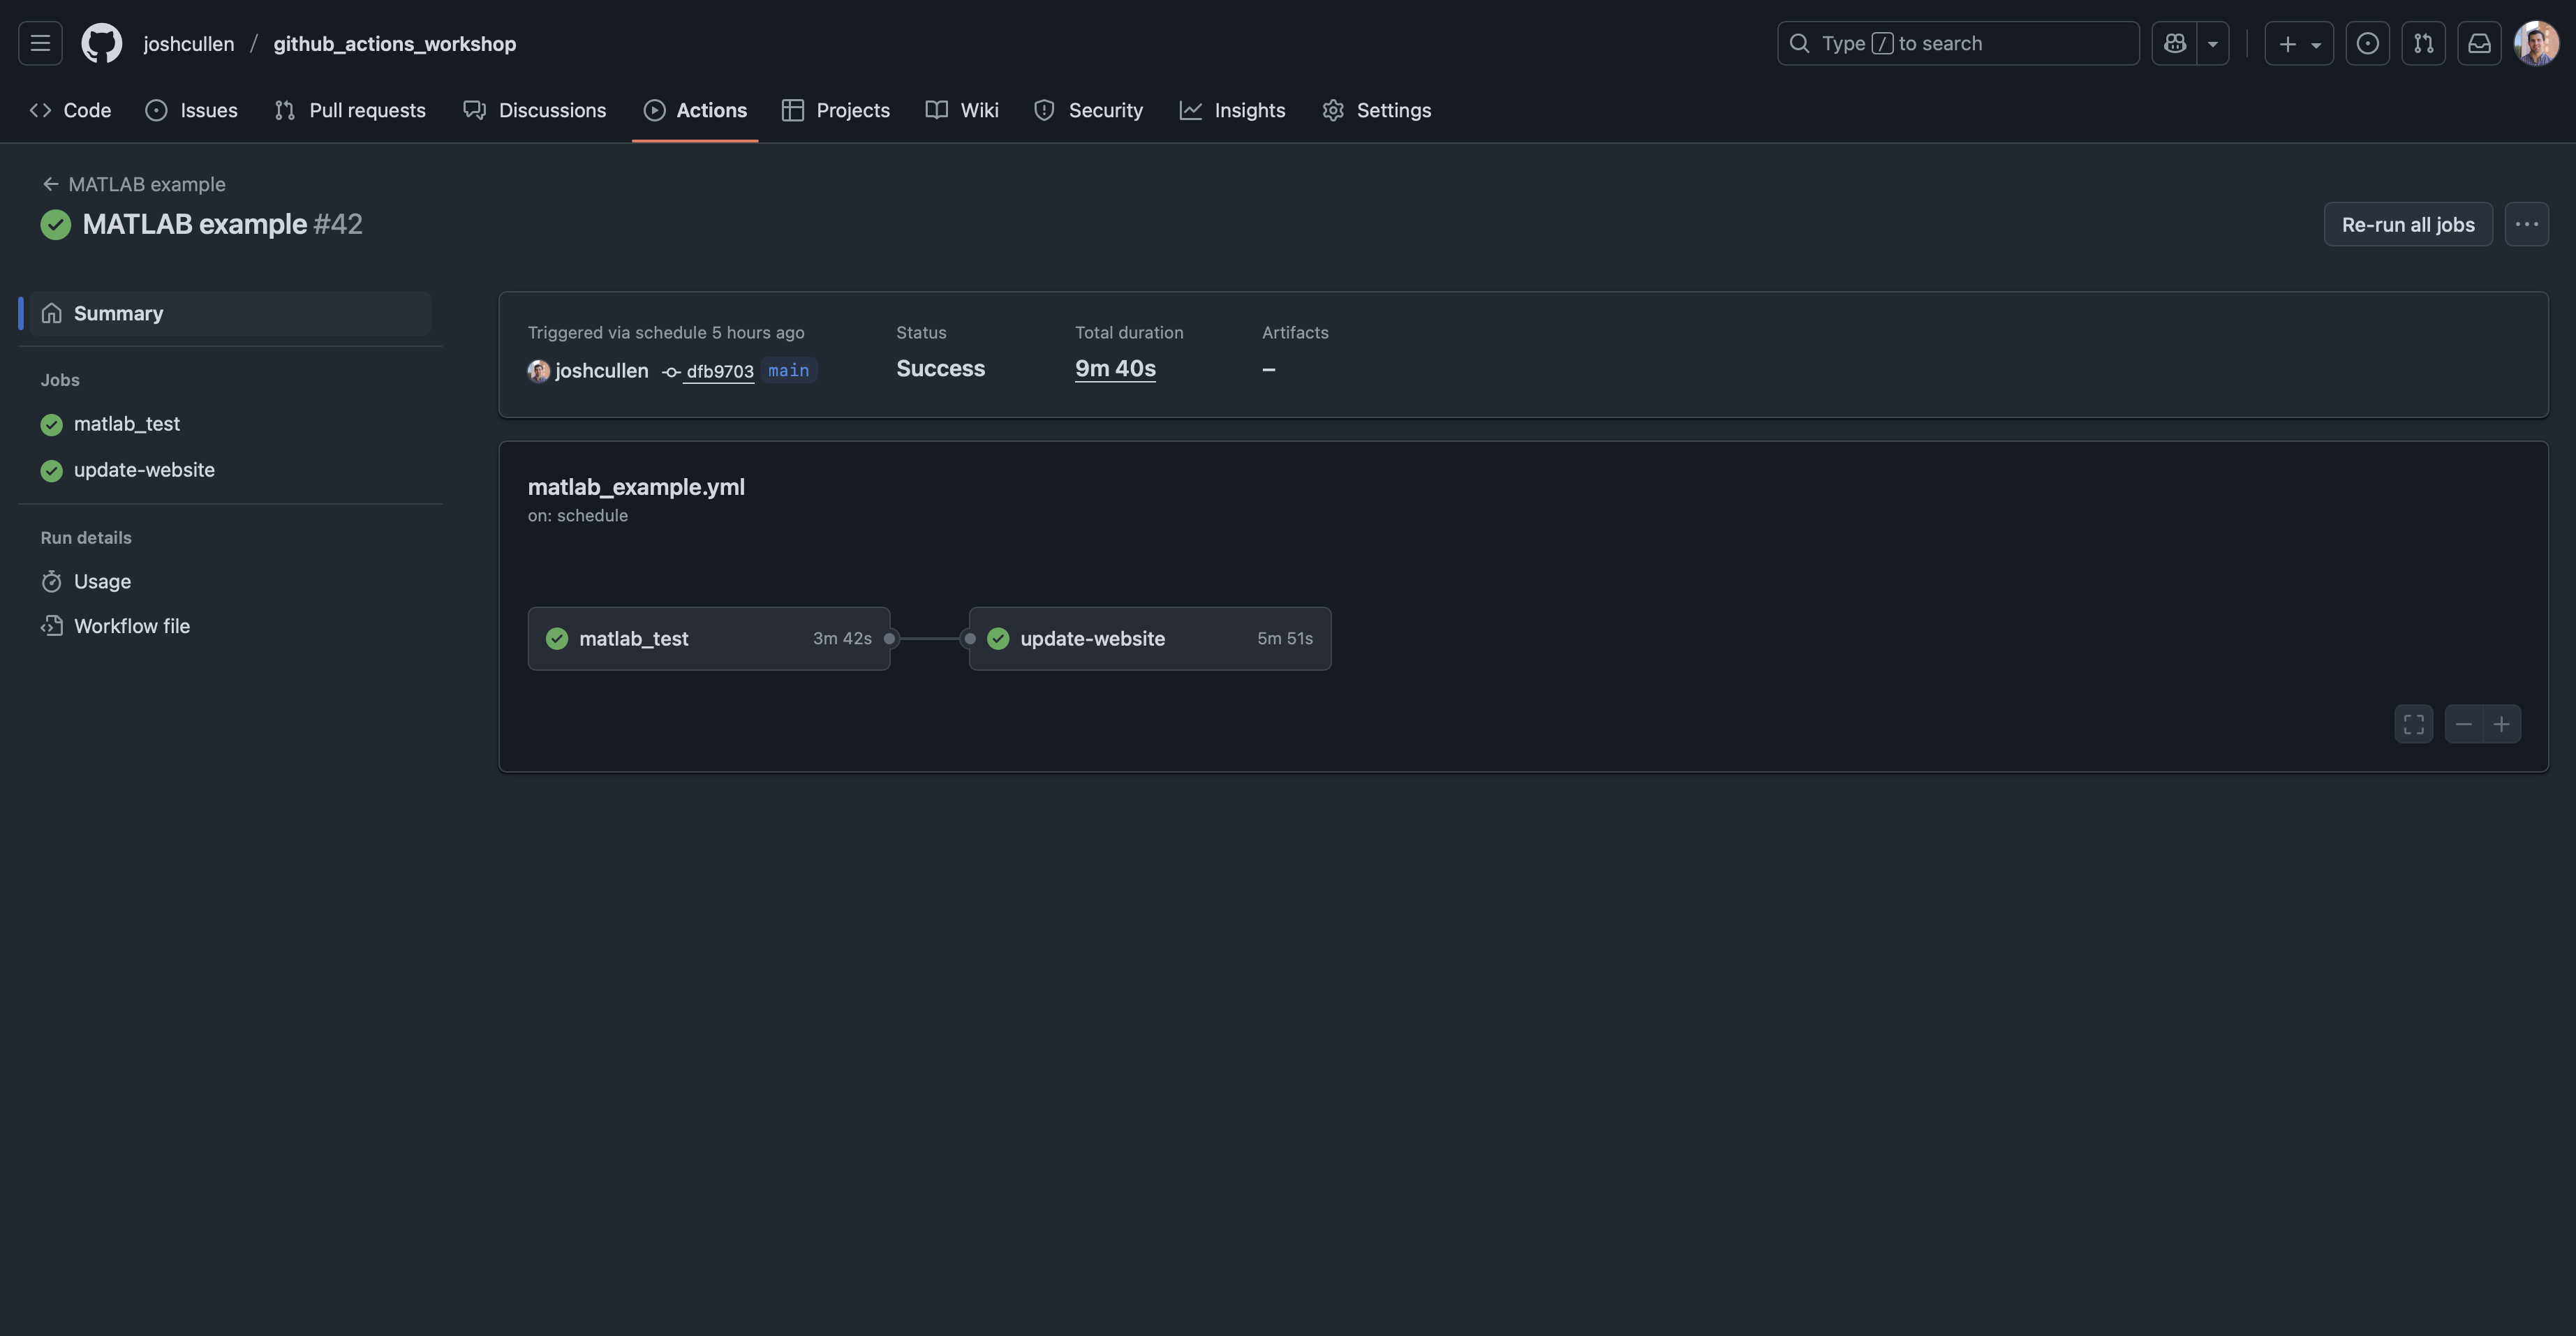
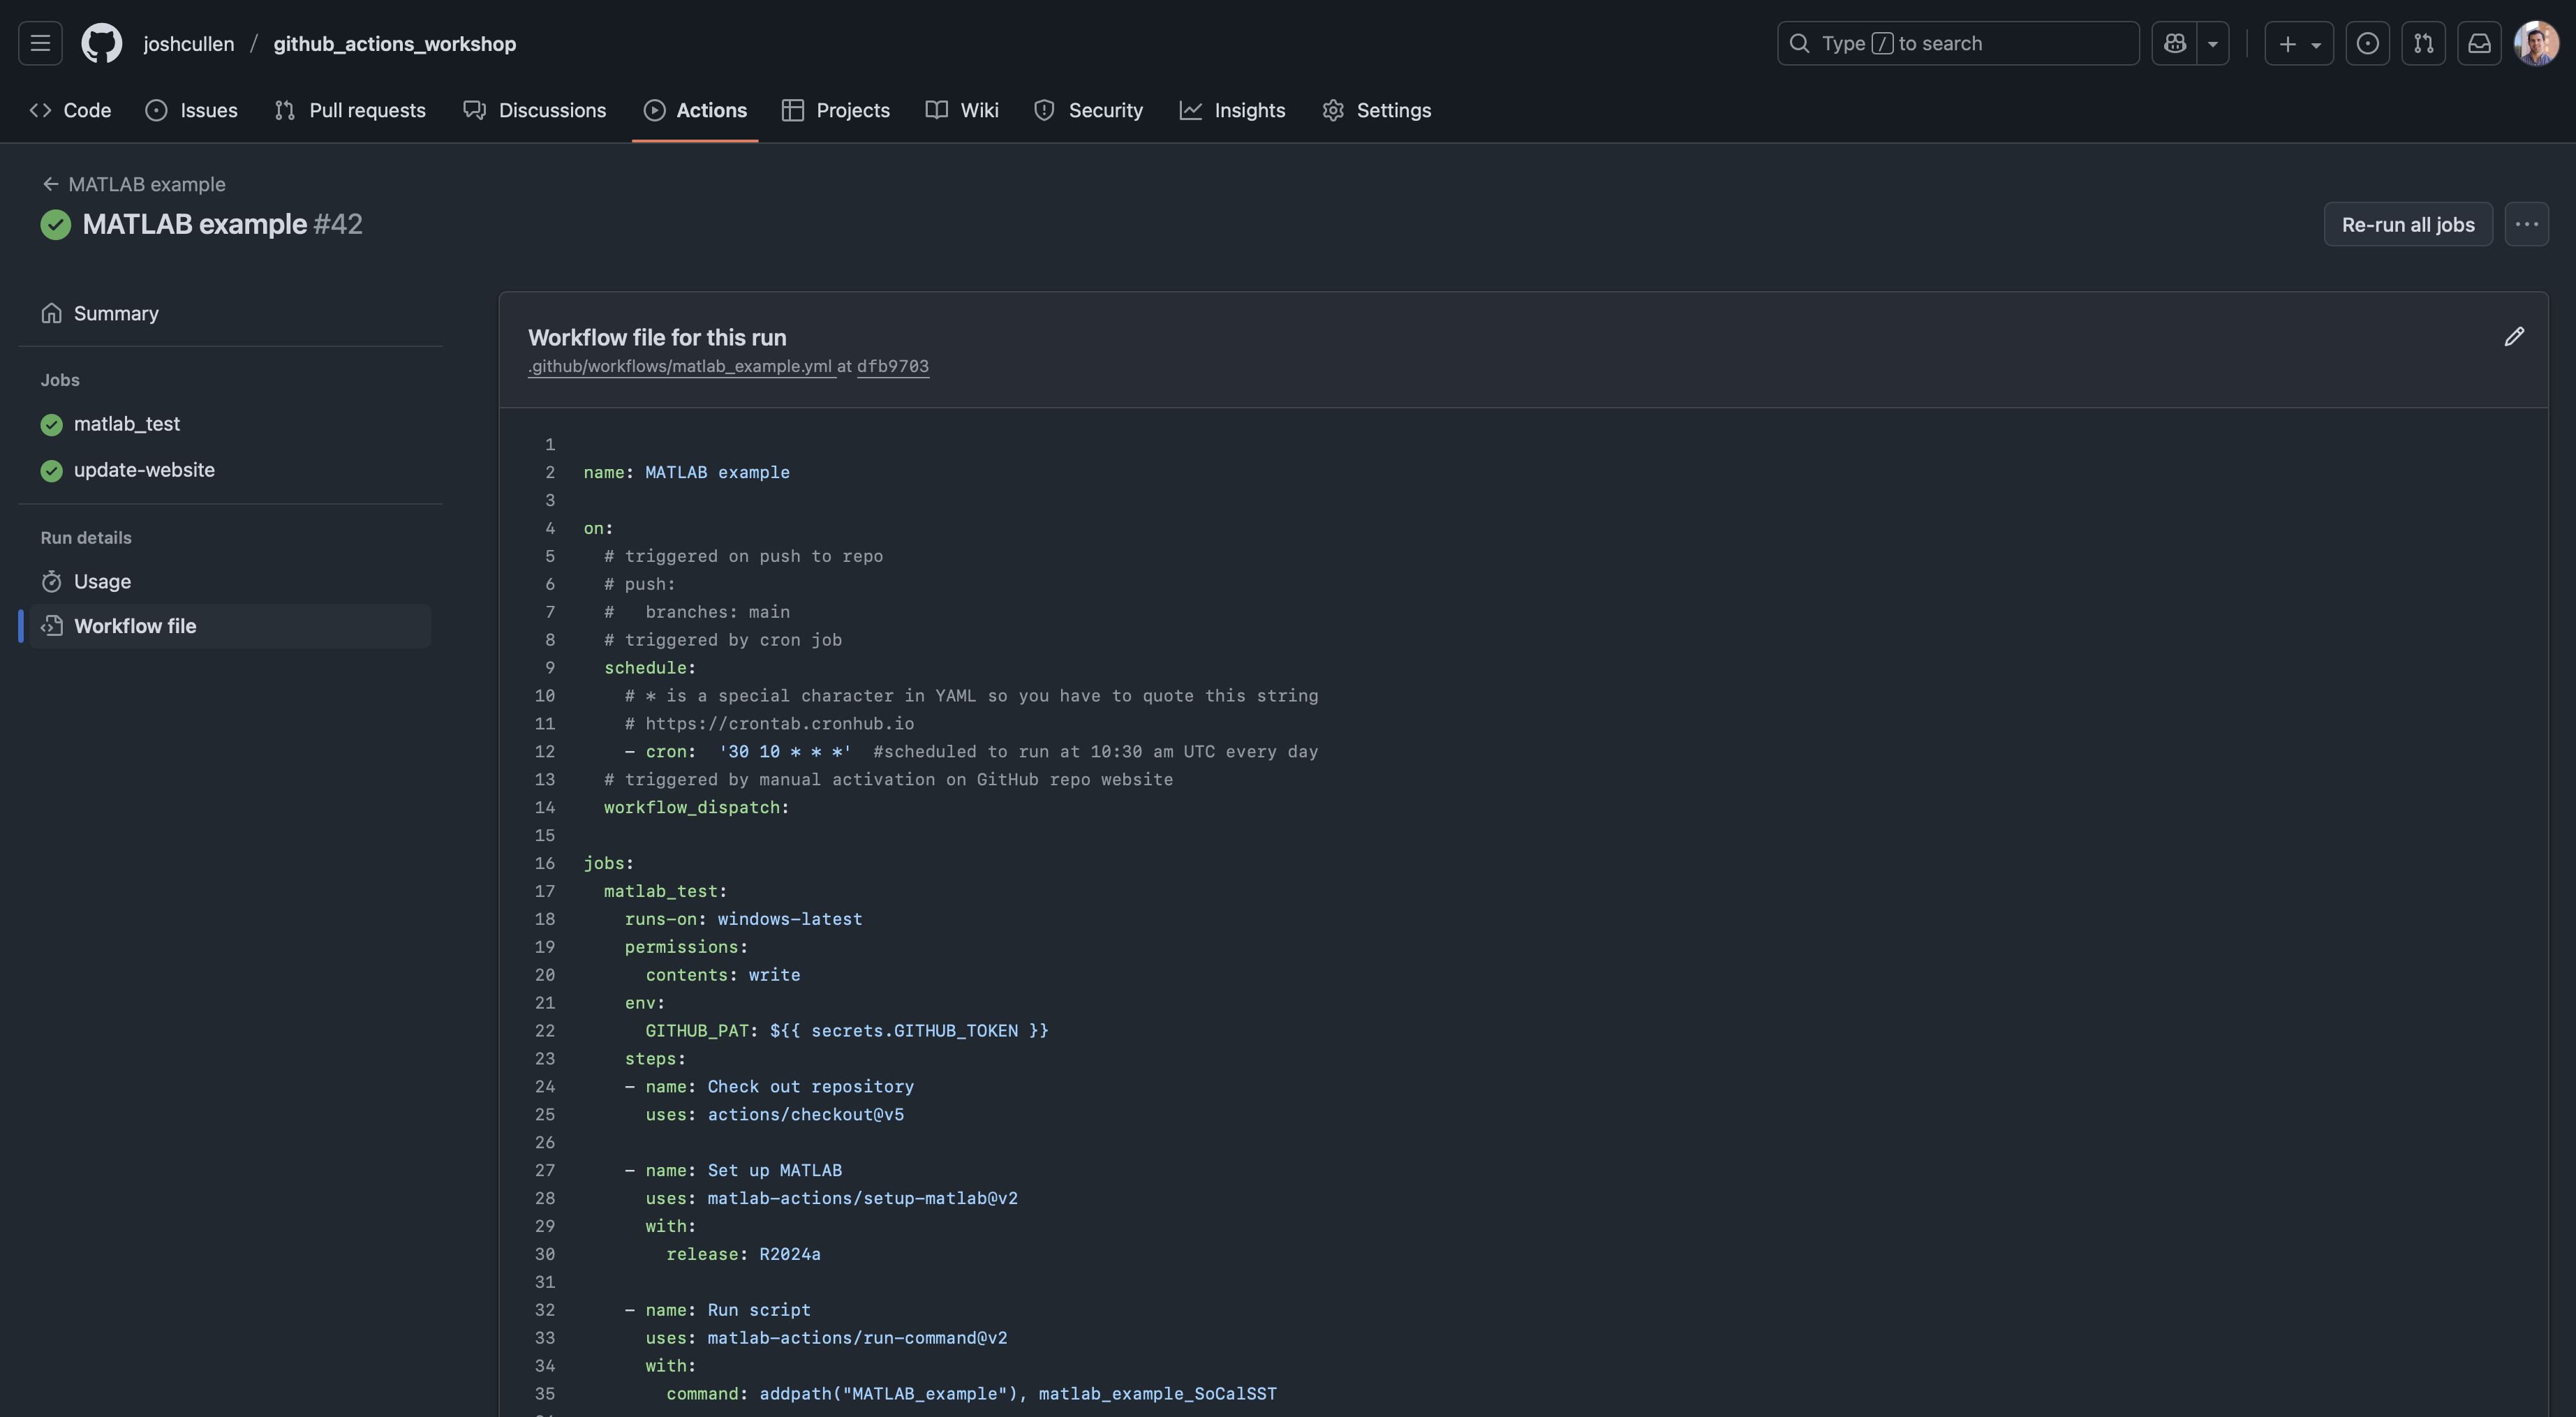
Here we see that there were two jobs included in this workflow file, and we can see their status and duration, as well as the relationship between jobs (since this can get quite complex for some workflows). In this case, we see that the “matlab_test” job is on the left side and directly connected to the “update-website” job on the right, indicating that “matlab_test” is run first and then triggers “update-website”. We can even take another look at our simple.yml workflow file by clicking the corresponding link in the sidebar to double-check what it’s doing if the file isn’t handy on our computer:
If we were to click on one of the jobs shown in Figure 3, such as “matlab_test”, then we can view the logs from this workflow. Additionally, these can inspected as the workflow runs in real-time for active troubleshooting of developing a GitHub Action workflow.
With this orientation to how GitHub Action workflows are configured via YAML files and how to explore these workflows on the GitHub website, we’re ready to start building on top of this by adding more steps to our workflow.